SafetyEngine User Manual
Introduction
What is SafetyEngine?
SafetyEngine is a digital platform and App solution developed by Ramboll, to support simulated behavior training and communication across multiple stakeholders.
Motivated by an increasingly high number of work incidents on construction sites and many years of experience as H&S coordinator across different markets, SafetyEngine is designed to strengthen the H&S onboarding experience by introducing a game-based learning solution hence facilitating and supporting communication, awareness, and safety behavior at work.
SafetyEngine rethinks the conventional health & safety induction by introducing generic and customized 3D environments inviting interaction, gamification, and fun learning. Furthermore, the app provides a digital toolbox to support sharing of important safety documents and news.
The App
The SafetyEngine mobile app is the tool used by the people on your project. It is there to assist them in their daily activities by providing convenient access to all of the information they might need throughout the day. Access to forms and documents is made simple with the app.
The Admin Portal
The SafetyEngine admin portal is used by the project administrators and HSE consultants on your project. The portal is used to manage the users of the app and to control what information they have access to. The portal is used to make information available to the app users and update what is already there. The portal is available through any web browser globally as long as you have an internet connection.
User Levels and Privacy
There are two roles in SafetyEngine by default: Project admin and User. App user accounts have access to the app and everything in there. They can log in to the admin portal too, but only to access all the same features that they have in the app as well as their profile page to edit their own basic information, like name and phone number.
Project admins also have access to the app and the same material on there. Furthermore, they have full access to the admin portal where they can manage the data for projects. All data available in the app has been added through the portal. Admins can also add and remove users and manage user groups.
User groups are an even more fine-tuned way of managing access. Most data in SafetyEngine can have access restricted to one or more user groups. Assigning a group to a news item for instance means that only users in that group will see the item in their news block.
Internationalization (i18n)
SafetyEngine has multiple available languages for all system text. If you wish, it is possible to translate all user created text through the web portal under Admin -> Translations. You can search for the string of text and add translations for the same languages that the app has available so the users will get the information in their language if available. If a translation has not been made for that text, the user will see it in English if that is available.
The App
Introduction (Intended use)
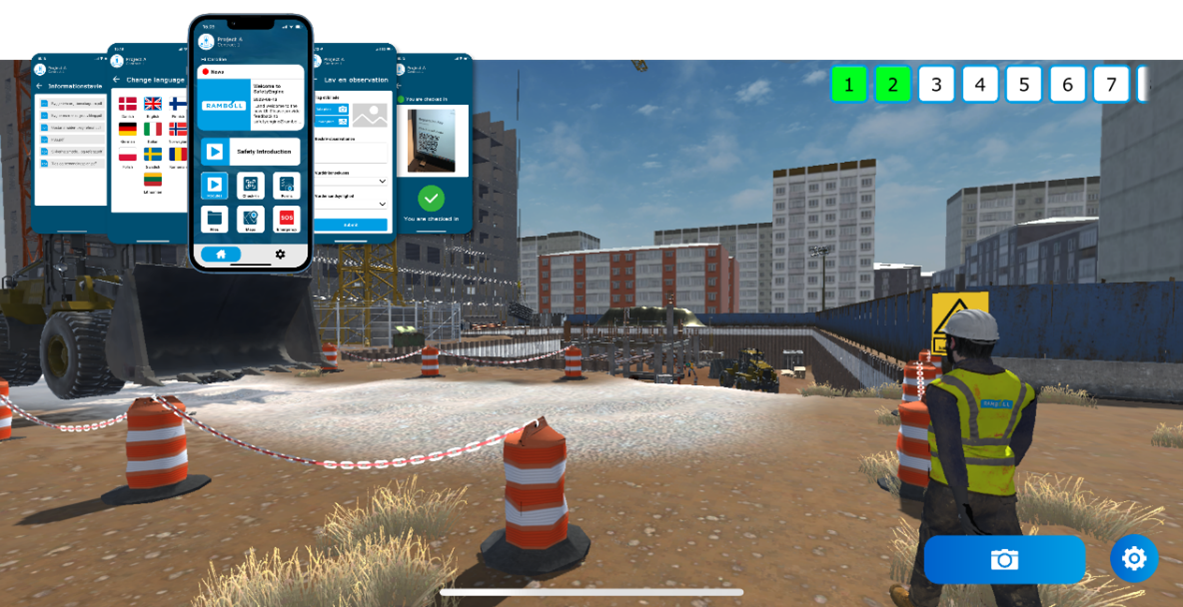
The SafetyEngine app is where the user gets access to the safety environment. The user can access the customized 3D induction, the digital toolbox where the sharing of important and current documents takes place and see latest news in the newsfeed.
The app is available for both android and IOS users and can be downloaded from App Store or Google Play. Search for SafetyEngine in the relevant store.
Registering
The first time you open SafetyEngine you need to create an account. The registration form is filled in as usual. To be added to the correct project you need a registration key. With your personal information and registration key filled in and submitted, your user will be created and added to the project. The registration key is obtained through your project administrator or HSE consultant. If you do not have a registration key, you will not be able to create an account.
If your organization uses single sign on through a school or work account, account creation is handled automatically. If your organization has completed the configuration on the SafetyEngine platform, you will automatically be put into the correct projects when logging in through SSO too.
Signing in
When you sign in you need to provide a username and password as a minimum, the username will be either your email or phone number. Your administrator may choose to enable further security for their projects in the form of Multi-factor authentication (MFA). MFA requires that you provide an extra code in addition to your password when signing in. You have two options for getting that extra authentication code, either through text message (SMS) or an authenticator app like Google authenticator. The MFA code is a 6-digit string of numbers used to verify that it is truly you trying to log in.
If you are using single sign on, all you need is access through your organization, so use the username and password you usually use for that account.
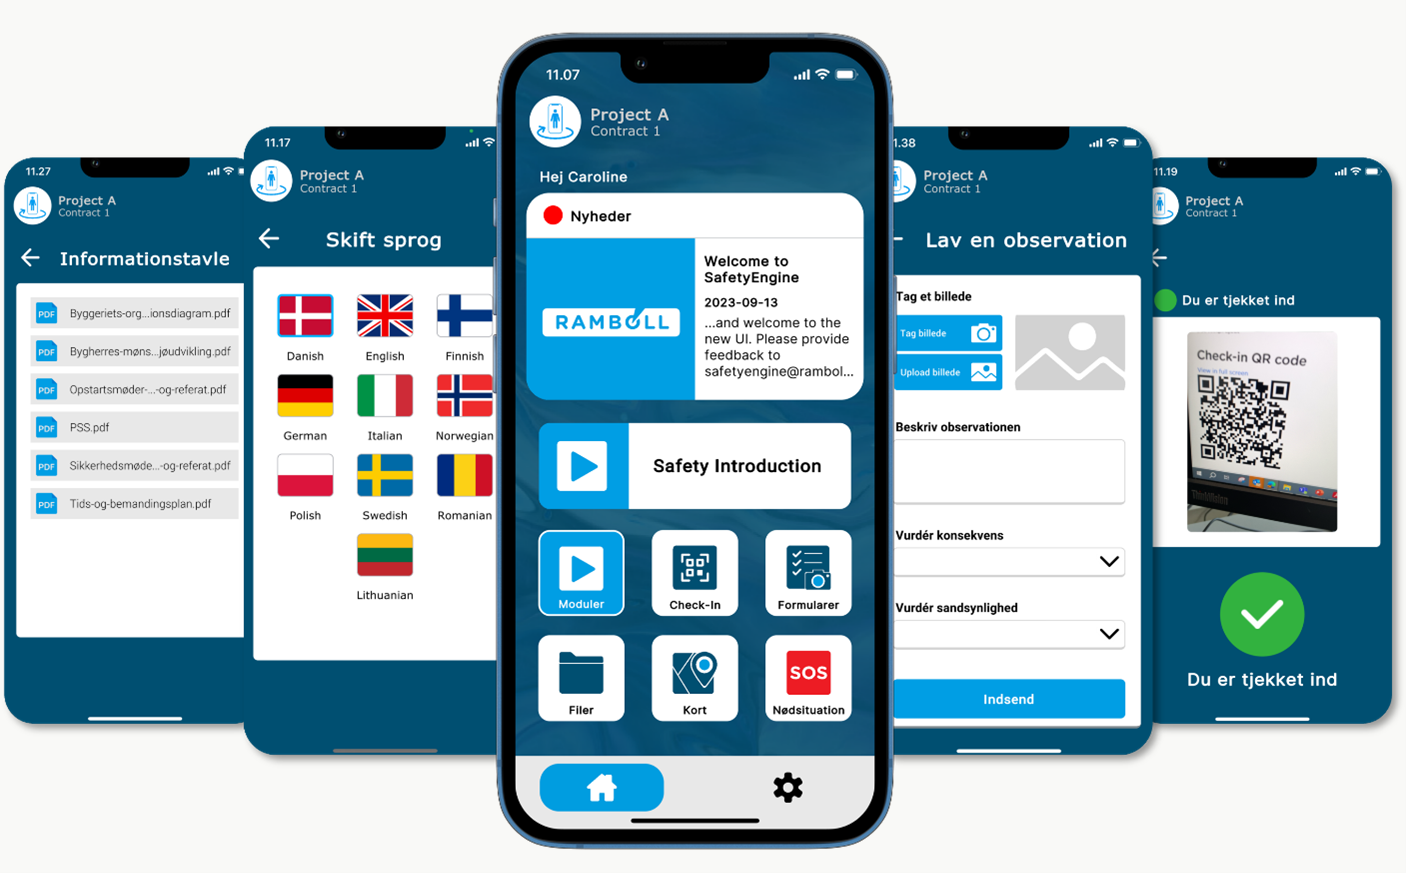
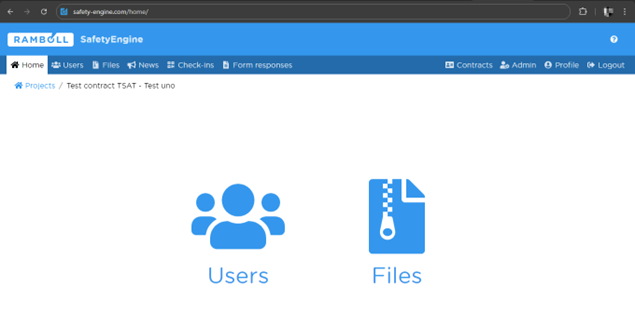
Front page
The front page is where you end up after you sign in, unless you have access to multiple projects. If you can access multiple projects, you will first be prompted to select which project you would like to access. The front page provides a quick overview of the most recent news and access to everything you need. SafetyEngine is optimized to have everything as readily available as possible. You can get to any file in two clicks and any form in two clicks. Everything else is just one click.
Training modules
In the training modules the user can access the introduction(s) and his diploma. First time the user logs in the introduction module will be available on the front page. Once the introduction has been completed, the direct link disappears from the front page, but it can always be found again in modules. Here the user can also find his diploma for completed training lessons.
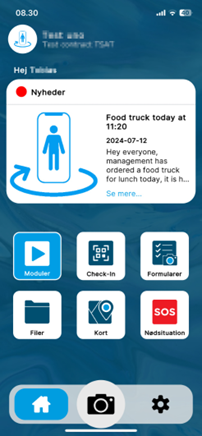
News
Get the latest news from your workplace or construction site. It can be anything from that the construction site layout is updated, to information about a social event or that a road is blocked, and you must navigate around it on a specific day.
The admin user can push out any kind of information relevant for the app user. If you have enabled push notifications on your device, you will also be able to receive such push notifications when new news items become available.
Check-in
The check-in option allows you to scan a QR code at the entrance and exit of the site to log your coming and going. If your site uses check-ins make sure to scan the code when you arrive and depart.
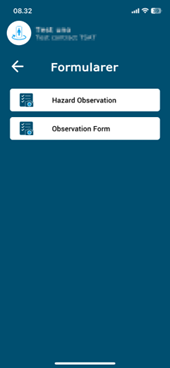
Forms
If forms have been prepared on the admin portal, you will be able to find them and fill them in here. Forms are a way of collecting data from the project sites. What data is collected is completely dependent on how the project admins have set up the forms.
Once you fill in a form and submit it, your data input will be sent to the admin portal, for the admins to process.
Should you need to take a break while filling in a form, or should you lose your internet connection along the way, the app will save your filled in information locally until you are ready to try the submission again. When you submit, you will always get a response of whether the submission succeeded or not, so you know whether you need to try again later.
Files
The files view presents the files available to the user divided by their folder. It will appear as a list of folders, each folder lists the files that have been uploaded to the admin portal in advance.
The access to folders can be restricted to a selection of user groups, and you will therefore only see the folders that you are allowed to access.
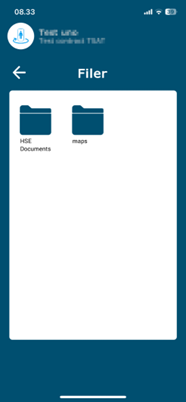
There are a couple of special folders for “Maps” and “Emergency”. These both have a special place on the front page, rather than in the general list of folders. More details about these special folders can be found in the following sections.
Maps
A special folder intended for maps, charts and drawings relating to the site or location of the project. If your project has special access routes, or you want to communicate where the canteen is located, this is where to put those maps. The maps folder gets a special placement on the front page where it is easily accessible.
Emergency
The emergency folder is another special folder with its own place on the front page. It is intended for emergency plans, meeting locations in case of fire or other incidents. It is also where important documents regarding safety and security should be placed. Such as a list of phone numbers to local law enforcement, hospitals and other emergency services. Contact information for the site management can also be put here.
Observations
The observation form is made on the web portal by an administrator. It is a form like any other form, but with a checkbox designating it as the observations form. There can only be one observation form per project. If one has not been made for your project, you can choose to use the default global observations form. The observations form gets a special placement on the home screen under the camera button. It is meant as a quick access form, but how it is set up is entirely up to your project admins.
Settings
The settings menu is where you can manage your preferences and check out generally available options.
Change project
When you signed in; if you have access to multiple projects, you were prompted to select which project to open. Should you wish to open a different project, you can do so by clicking this button. It will take you back to the same project list that you saw after signing in; and selecting a project here will bring you to the front page for that project.
Change language
There are many languages available for the app, and more being added along the way. When you first open the application, it will try to match the application language to whatever your phone’s preferences have set. If your language it not available yet, it will default to English. Whenever, if you would like to change to a different language, you can do so from this menu.
Change password
Should you need to change your password, you will do so by clicking this button and subsequently filling in your phone number or email address into the form that is presented. Upon submitting the form, you will receive a text message or email with a unique, personal, time-bound, one-time link, which you can click to change your password from the admin portal.
Contact support
This button is your shortcut to get in contact with the SafetyEngine support team. Clicking this button will open your default email client and start a new email message with the support email already filled in.
The Admin Portal
Introduction (Intended use)
The SafetyEngine admin portal is accessible at https://safety-engine.com where any user can log in. The portal is used to manage projects and the data on them. This is where documents are added, news are created and observations handled.
Signing in
All users can sign in to the admin portal, but by default only project admins can access all the features. Users with regular privileges can only access their profile page and edit basic information (See Profile) along with working with the data that is also available from the app.
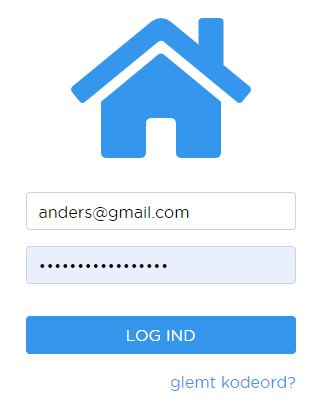
To sign in, use your credentials of username (email or phone number) and password. If your contract or project requires extra security; Multi-factor Authentication (MFA ) or Single Sign-On (SSO) might be necessary to gain access.
When successfully signed in you will have access to all the projects of which you are a member.
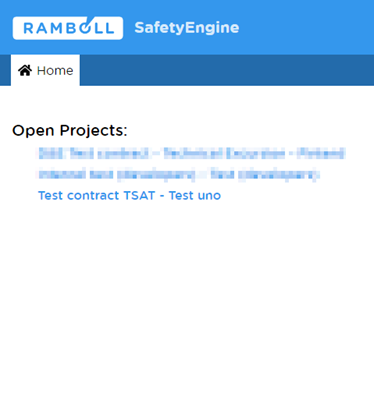
Project list
On the project list you can see all the projects on which you have a role. There may be cases where your access have been disabled based on inactivity, in which case the project will be greyed out and inaccessible.
Upon clicking a project name, you will enter the project and be able to manage all of the data for that project according to your role's permissions settings.
Profile
The profile page allows you to see and edit all your own basic information like name and email. This is also where you can change your password and enable extra security with Multi-factor authentication (MFA).
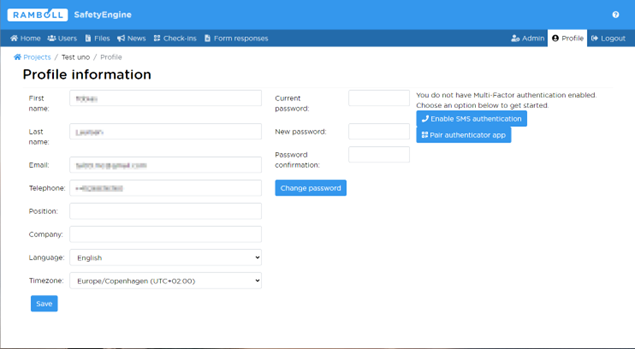
You can also choose your language and time zone settings here.
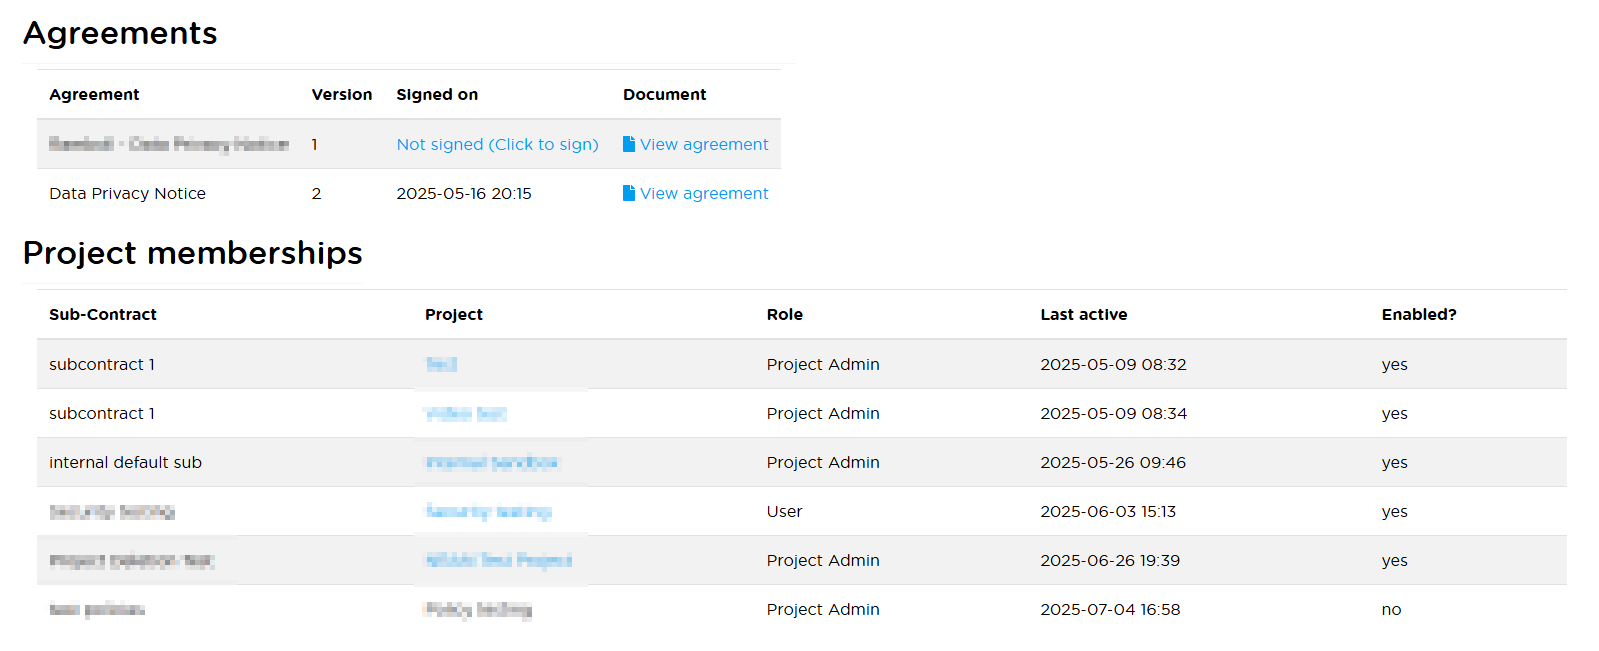
At the bottom of the profile page you can see the agreements you have accepted and also keep track of all of your roles and your last activity for each role.
Changing basic information
To edit information on the profile page, click in one of the boxes and edit it. Make sure to save your changes before clicking away from the profile page.
Changing your phone number or email requires verification (see below).
Changing password
To change your password, fill in the fields of previous and new password. Make sure to write the same password in the new password and password confirmation boxes and click the button to change password.
Setting up MFA and phone number verification
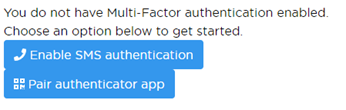
Multi-Factor Authentication adds another layer of protection to your account. In SafetyEngine there are two different ways to enable MFA. It can be set up with SMS or an authenticator app like Google authenticator.
Verification
To set up MFA using SMS; make sure your phone number is correct and verified. If your phone number is not yet verified you will see this option:
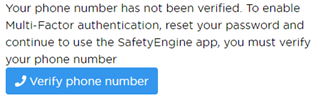
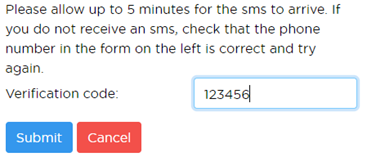
Click the button, and an SMS will be sent to the phone number you have on your profile containing a unique 6-digit verification code. When you receive the SMS make sure to put the code in the field that appears:
Once your phone number is verified, you can enable MFA.
SMS
To set up MFA by SMS choose that option from the MFA panel.
When you click the button an SMS will be sent to the phone number you have verified with a 6-digit authentication code. When you receive the code, put it in the field that appears to complete MFA by SMS set up. This step is necessary to verify that you have access to the phone number you have provided and that the MFA system is set up correctly.
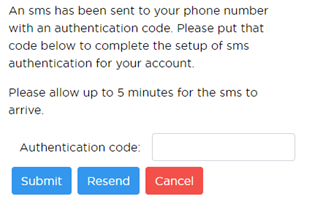
When you submit a valid authentication code, MFA will be enabled for your account, and you will need access to your phone and phone number to log in from now on.
When you see this in the panel, MFA setup is complete.
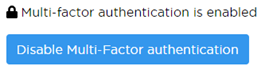
MFA can be disabled again with the button, but if you are on a contract or project where MFA is enforced for all users, the option to disable MFA will not be available to you. You will of course be able to switch between SMS and Authenticator as your MFA method as needed.
Authenticator
To set up MFA by Authenticator click that button.
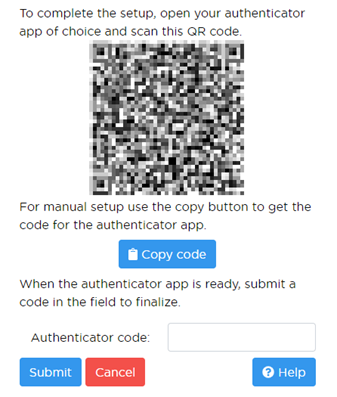
To have it set up automatically most authenticator apps have an option to scan a QR code. If yours do not, or you prefer to set it up manually, you can click the copy code button to get the underlying secret key your authenticator app needs to generate OTP.
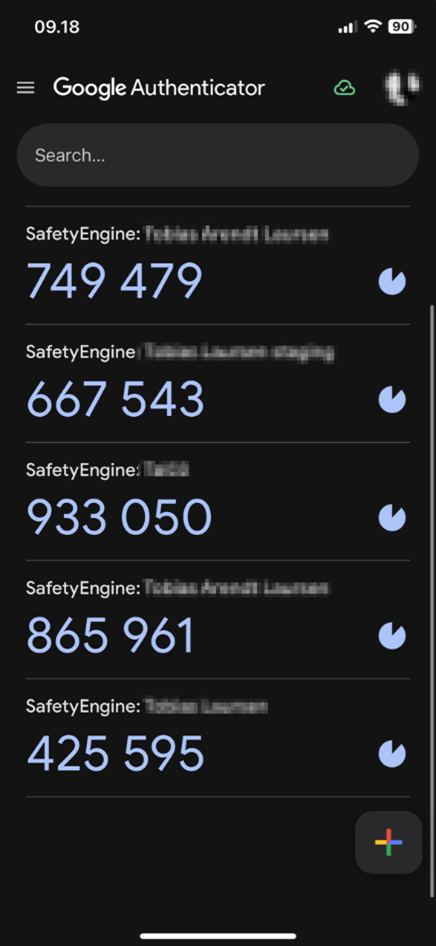
We recommend Google Authenticator. It is free, easy to use and the codes will look like this when setup is complete:
To complete setup of MFA by Authenticator, take the code your app has just generated, and put it in the field in SafetyEngine and click submit.
Just like with SMS you will need access to your phone from now on to log in to SafetyEngine.
Project Administration
The admin page consists of multiple tabs each pertaining to a different part of the system. Each of them will be covered in this section.
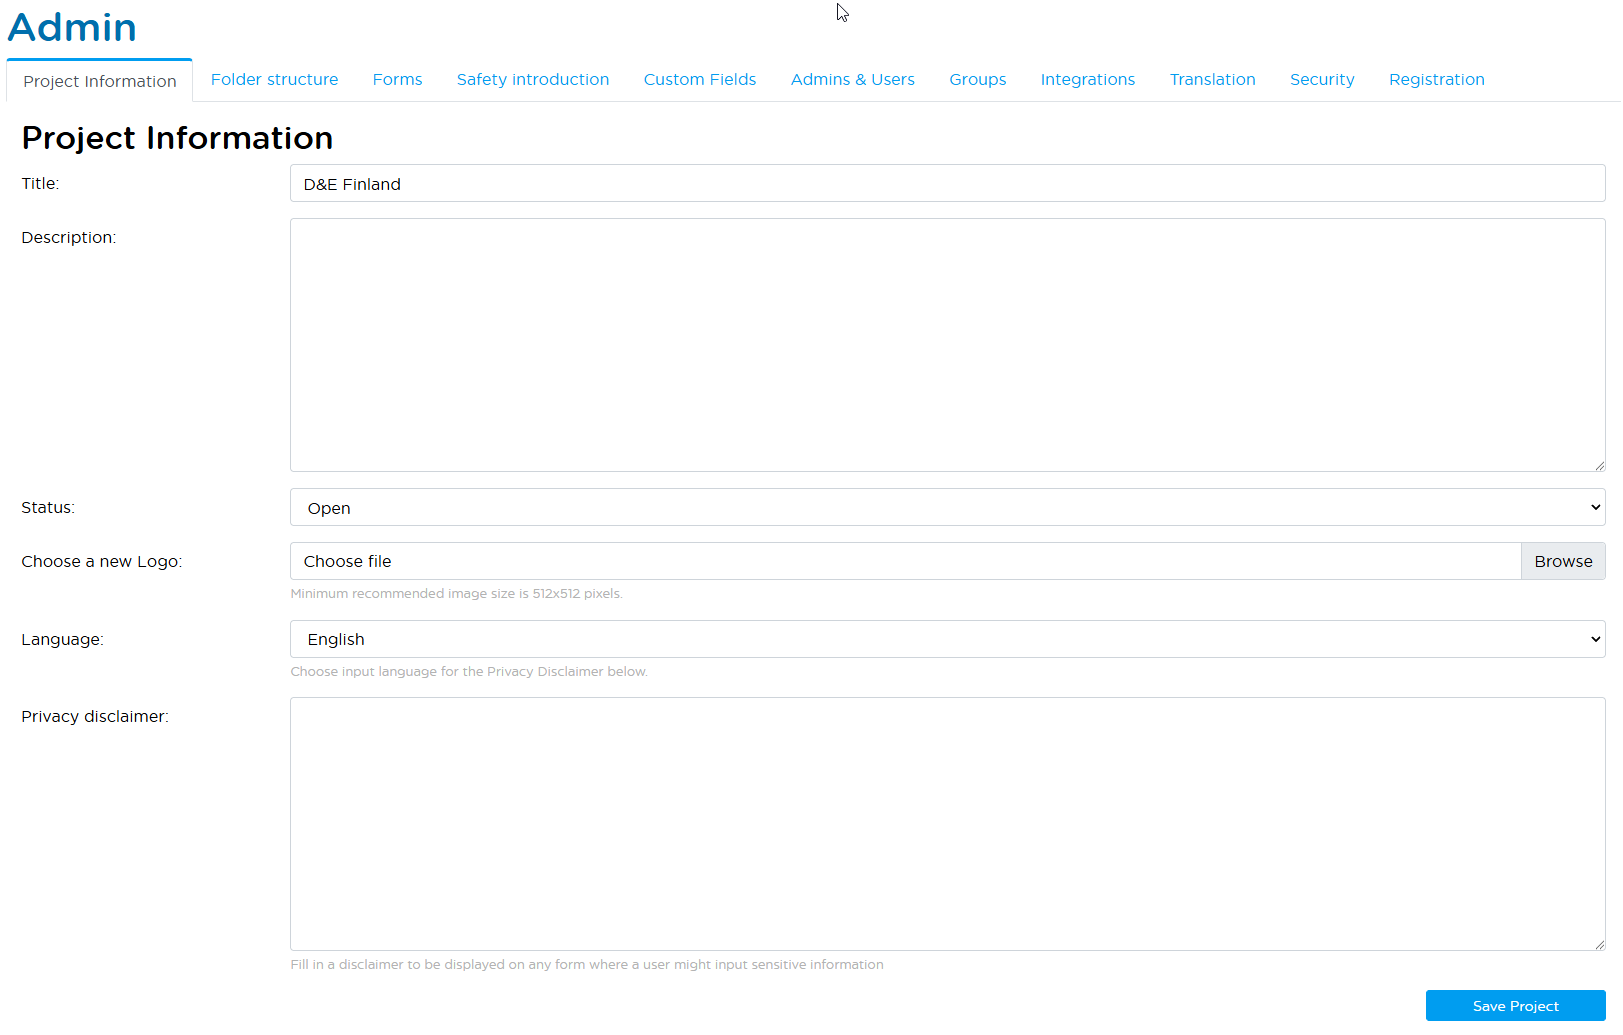
Project information
The project information page holds the basic information of the project. Like the title, description and status.
The project has special Privacy Disclaimer fields, which - when filled - will display this disclaimer on any data form, news, or file upload input where a user might upload sensitive information. This is your place to specify any project specific rules or policies for what may be uploaded to the project
This is also where you can manage QR codes for check-ins, which are covered later in this manual.
Folder structure
The folder structure is used to organize files in SafetyEngine. The folders can be limited to specific user groups to make sure the view is uncluttered and only contains relevant documents. Additionally, you can limit access to the folders to specific user groups, so only users in those groups will see the folder and its contents.
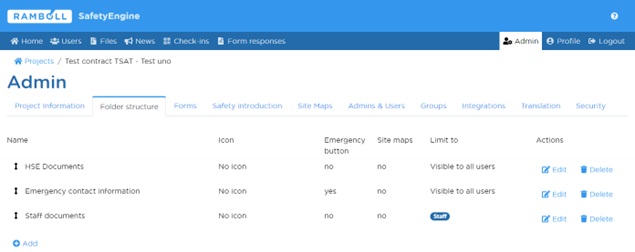
The emergency option on a folder makes it available in the app under the SOS button on the app front page. This is intended for emergency documents, like a list of phone numbers to rescue services, police, fire department, nearest hospital and so on.
The site maps option makes the folder available on the front page under the maps button. This is intended as a place to put maps, drawings and other location related documents
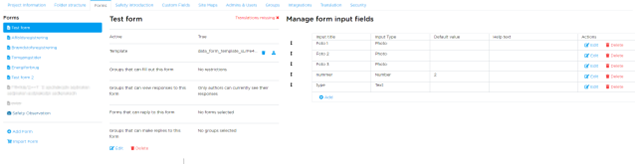
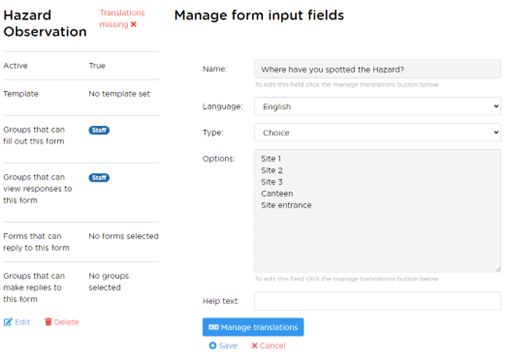
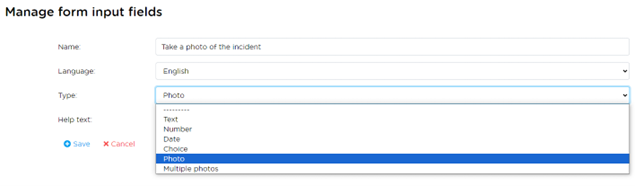
Forms
Forms allow for customizable communication from your users. It is entirely up to you how they look and what purpose they should fill. Forms can be restricted to specific groups of users. The fields on the form are also customizable, within the types of free text, a number, a date, a list of choices and photos.
The forms template is a document built with the Jinja2 template renderer in mind where data from a response to the form can be automatically put into a formatted Word document.
Forms have a multitude of options allowing you to set them up exactly as your project needs. For a form to be available to your app users it needs to be active. Inactive forms are grey in the list of forms. If you don’t want it to be available to everyone, you can limit it with user groups.
If your form is one that requires follow up, you can define a “reply form” for it. A reply form points to a main form and is a way of addressing whatever the response to the main form is about. If the main form reports an issue with a guardrail, the reply form might be about what has been done to address the issue.
Another special checkbox is the observation form. The observation form gets the camera icon in the forms list, and a special placement on the home screen of the app. The observations form can be any form that your users need special quick access to.

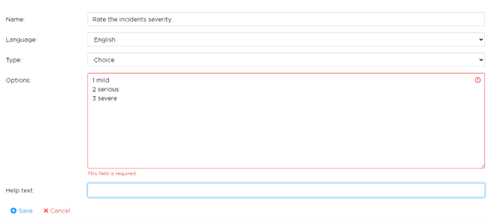
If the predefined forms do not match your need, you can import a copy and modify it to your liking. When creating forms you need to specify the fields that are going to make up the form. There are several options to choose from.
You can define a default value for all but the text, number and date field. The choice field needs options defined. You make these options with newline separation, so the options 1, 2 and 3 would look like this:
Safety Introduction
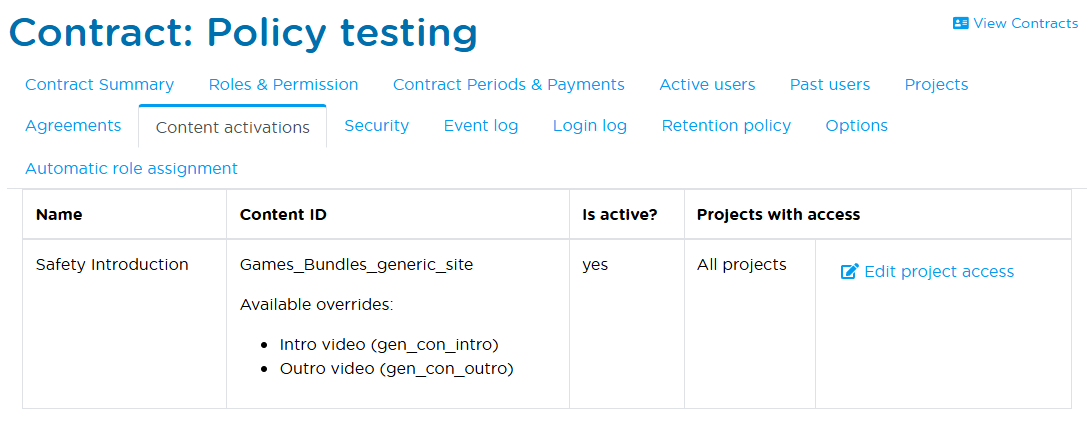
On this page you can manage the available Safety Introductions. A safety introduction can be limited with groups, so that only a particular group of people will have access to the content in the app. If no groups are selected all users in the project have access. There may be several different safety introductions available, depending on your contract, and each of them may offer various content that can be overridden with project-specific content. For instance, in the screenshot below, you can add intro and outro videos to customize the experience. A safety introduction may or may not have a predefined default for such and intro video, and now the project admins can override this default with something project-specific. This can be a good way to introduce the users to the system or the site before they complete the safety introduction.
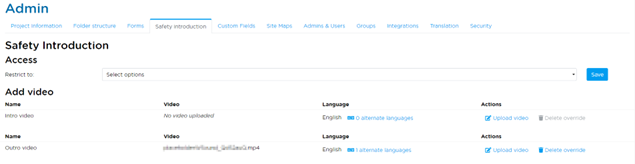
Each content override can have language specific versions; for instance, you can upload videos for different languages if there are multiple nationalities on your site. When the app user interacts with the safety introduction through the app, they will see the video that corresponds to the language that user has chosen in the app.
Users
This panel is for managing the users on the project and what their role is. You can also edit the basic information for other users if your role grants you that permission. This is also where you can manually add new users or admins to the project without them having to go through the registration process first.
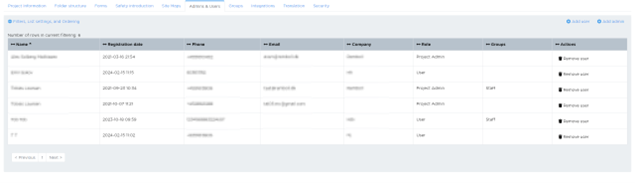
This is also where you remove users, change their roles, and manage their user groups.
When a project admins adds a user from this screen, the admin needs to fill in all of their information. This is an alternative to having the app users create their own user profile from the app. If someone creates a user through the app, but they need to be project admin, you can promote their access level from this panel in the role column.
If the user you are adding is already a SafetyEngine user on another project an option to add them to this project will appear. If they are not a user already you need to fill in all of their information and create the account for them.
Groups
Groups are used to control who has access to what. They are also useful when sending news and making sure the files view in the app is uncluttered and only relevant information is available.
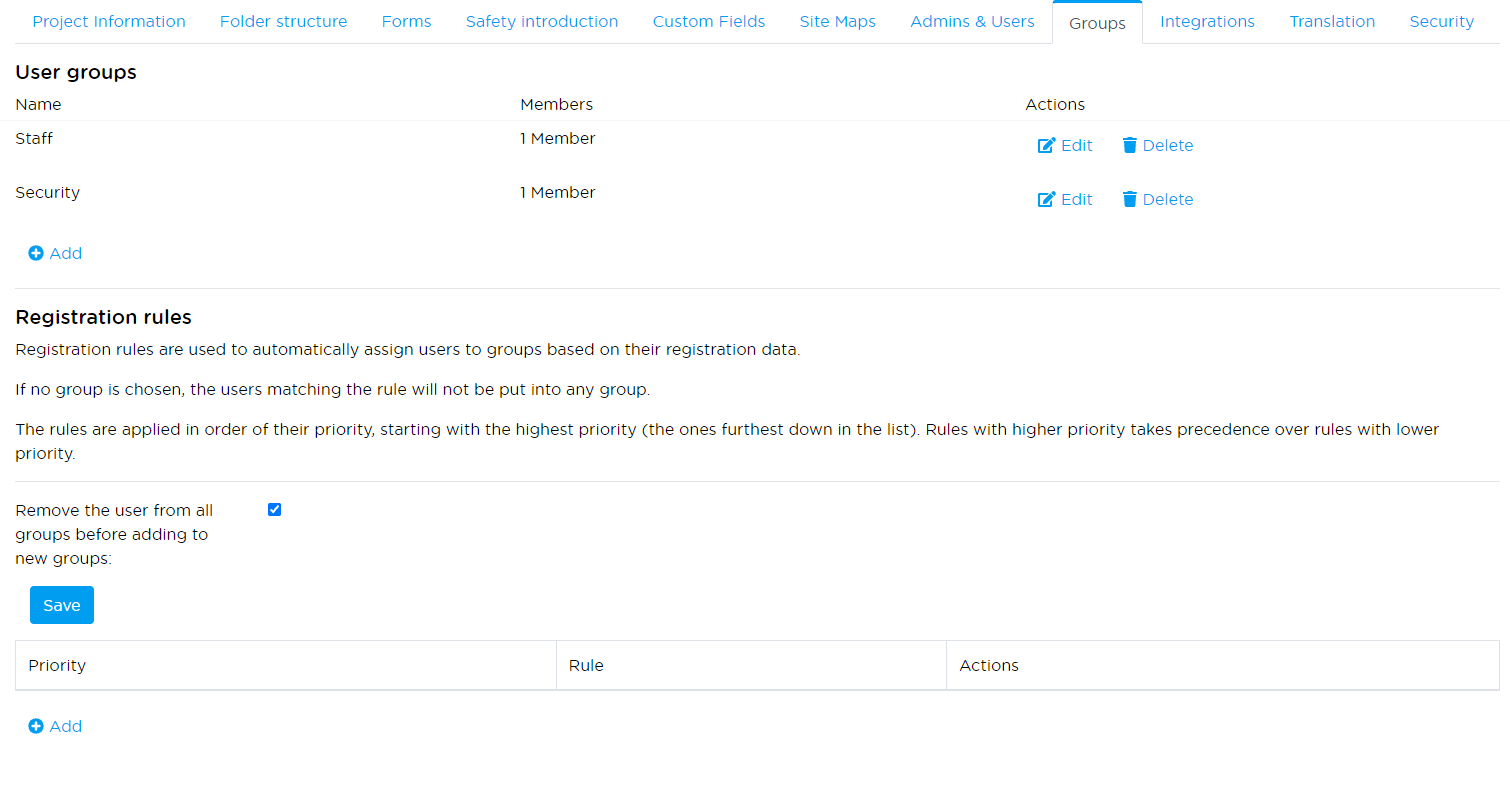
Users can be assigned to any number of groups, and groups can hold any number of users, so there is full flexibility to organize the users as needed.
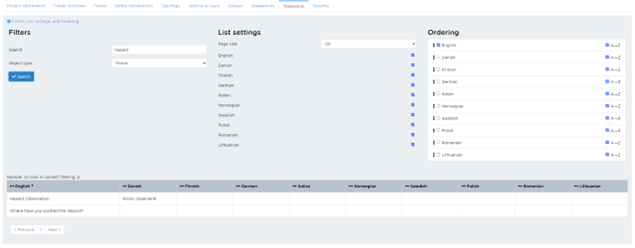
Translations
In the translations tab you can add internalization to your forms to make them more accessible to everyone on your project.
When you create a form, you will initially fill in the field names and options in your chosen language. Then, you will have the option to have them translated into any of the supported languages.
Security
The security tab is available in a project context and a contract context. In all cases a user will be subject to the strictest rule that applies to them. If there are security settings for a contract it will be applied to all users on any project under that contract. If you have general security policies across all sites, you should set them for the contract. You can also have general security on the contract, and then set a stricter policy for a project if it needs it.
For a full explanation of the security settings, see the Security section for the contract.
Registration
The registration tab is used to set up registration keys that users need to join the project. The registration keys are unique and project-specific codes that are used to make sure that only the right people get access to the project.
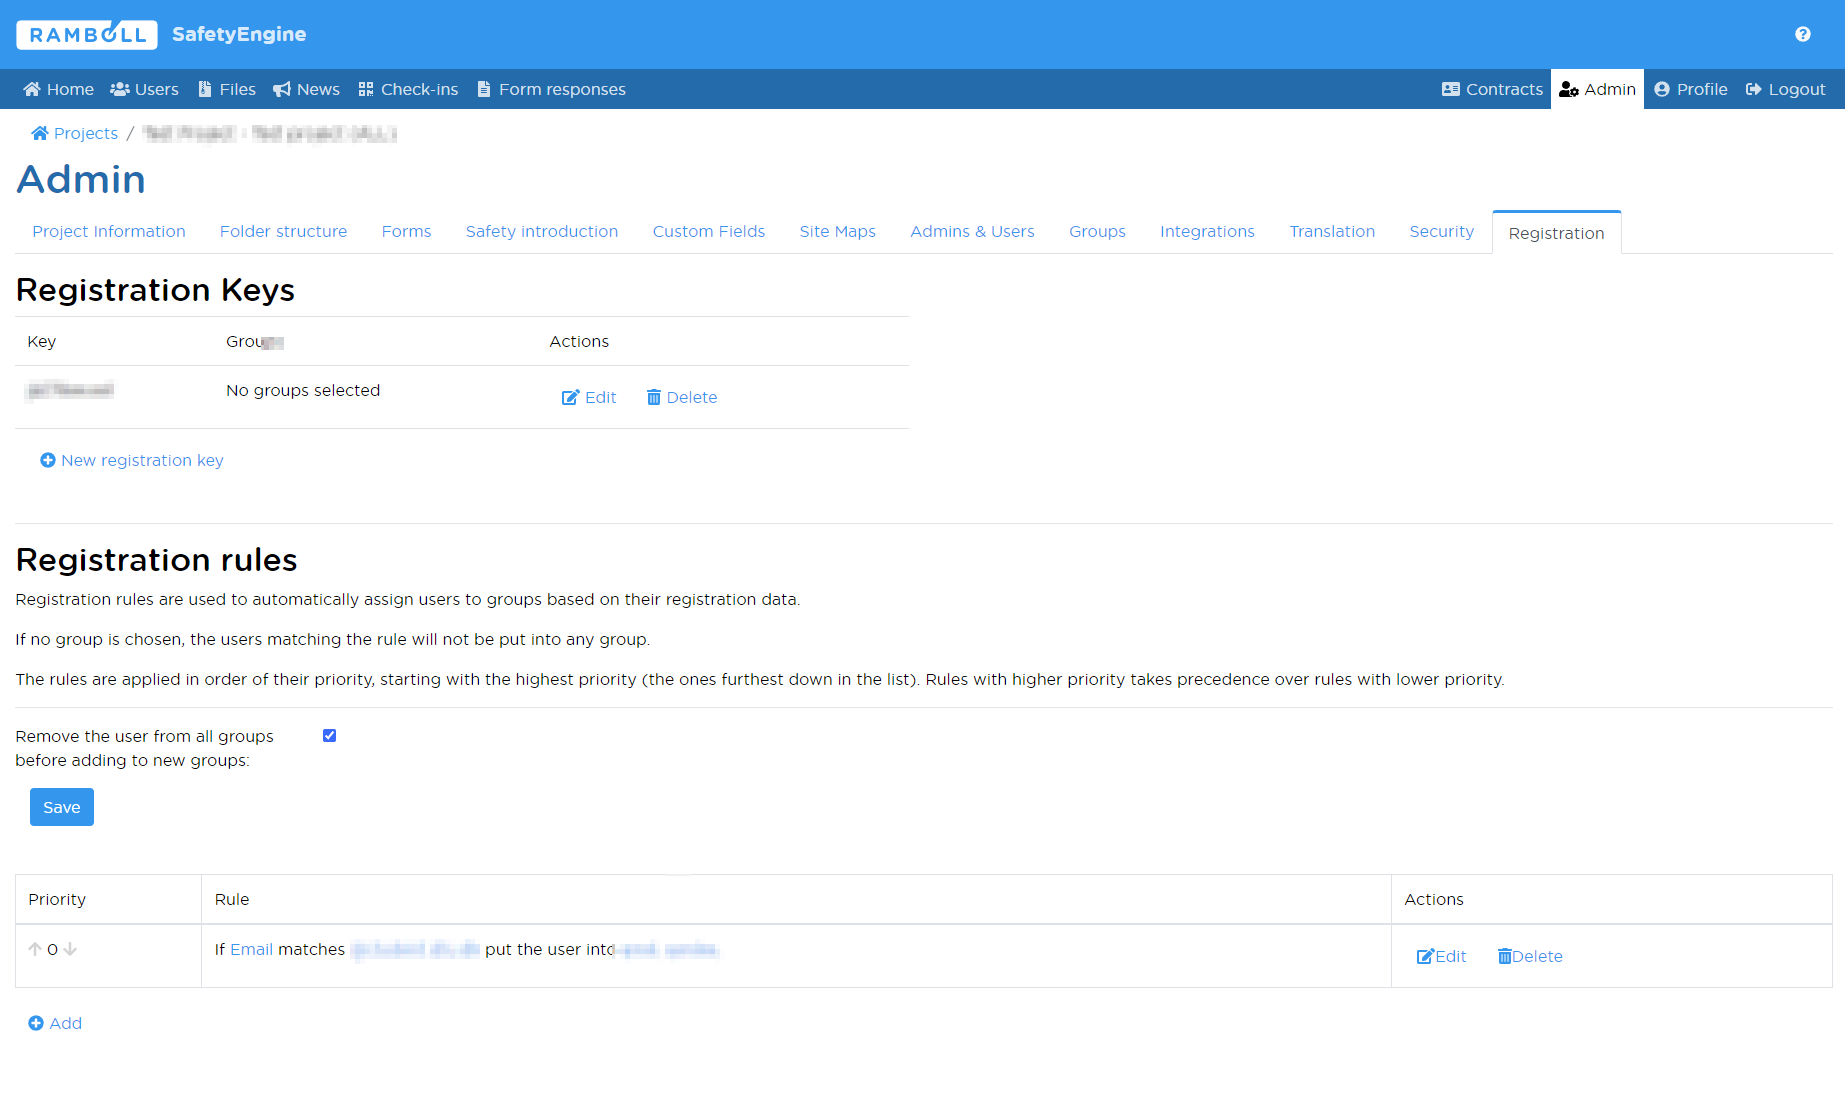
Registration keys need to adhere to applicable security settings in regards to length, usages and valid time. By default registration keys 8-30 characters in length, and otherwise unconstrained. The system will always append 3 random numbers to ensure uniqueness, thus the UI will enforce a length of 5-27.
In cases where typing a registration key is not convenient, it is also possible to display the code as a scannable QR code. A full-page QR code will be displayed, which lends itself well to being printed out and displayed at the entrance of a construction site or similar location.
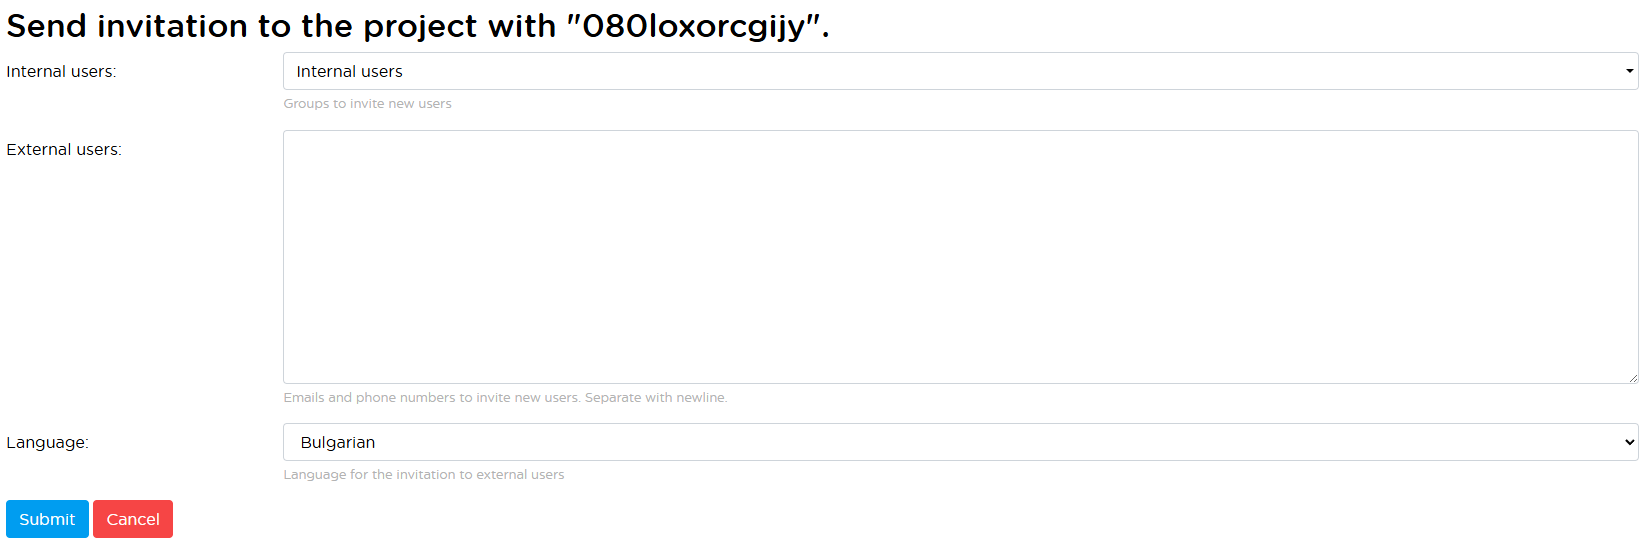
An alternative means of distributing registration keys is to use the "Invite users" button. This will display a form, where you can select an existing group of users and/or type in a list of email addresses and phone numbers in order to decide who should receive the registration key. The recipients can then either use the registration keys themselves or pass them on to others.
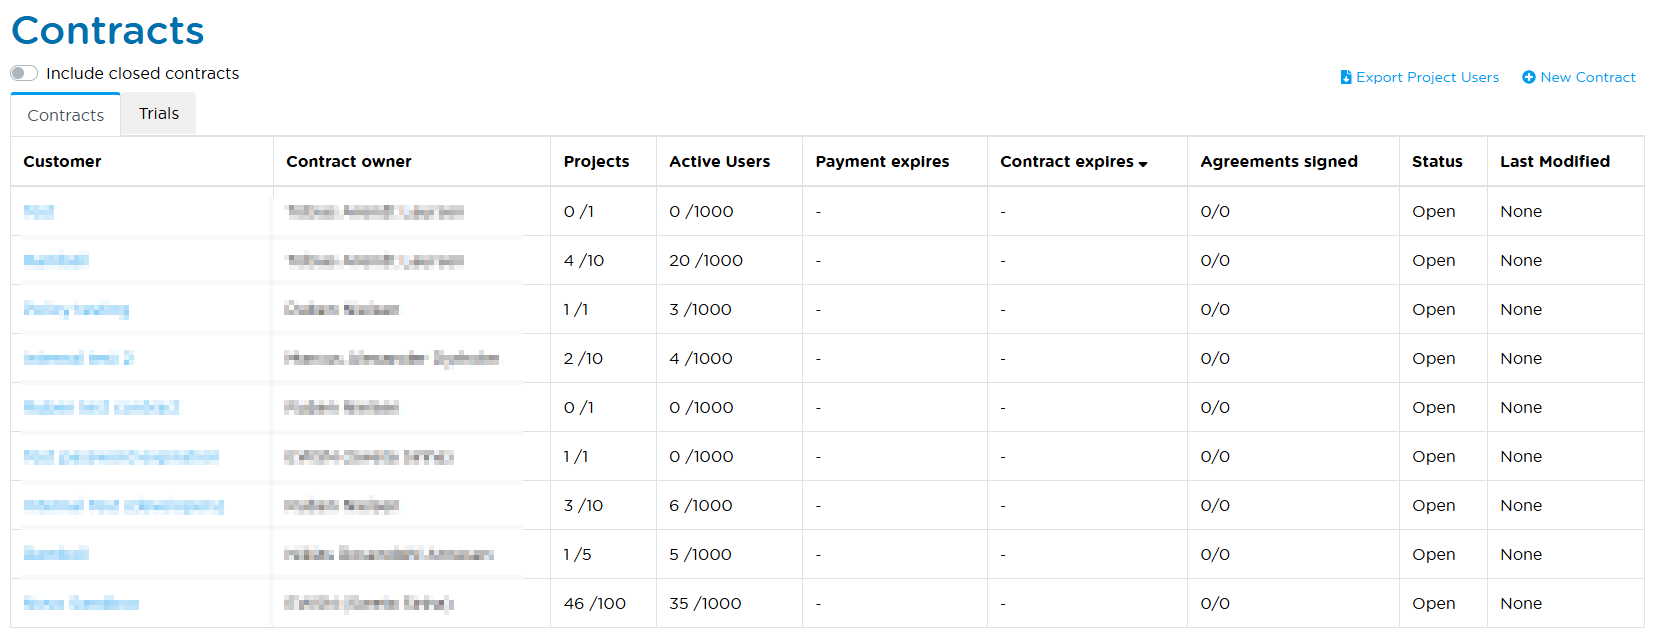
Contract Administration
The contracts view is only available to contract owners and appointed contract administrators. Here you can see a list of the contracts you own and the details of them. In most cases, you account will only have access to one contract, in which case you will be redirected directly to it; but if you are a contract owner for multiple contracts, you will see them all listed here.
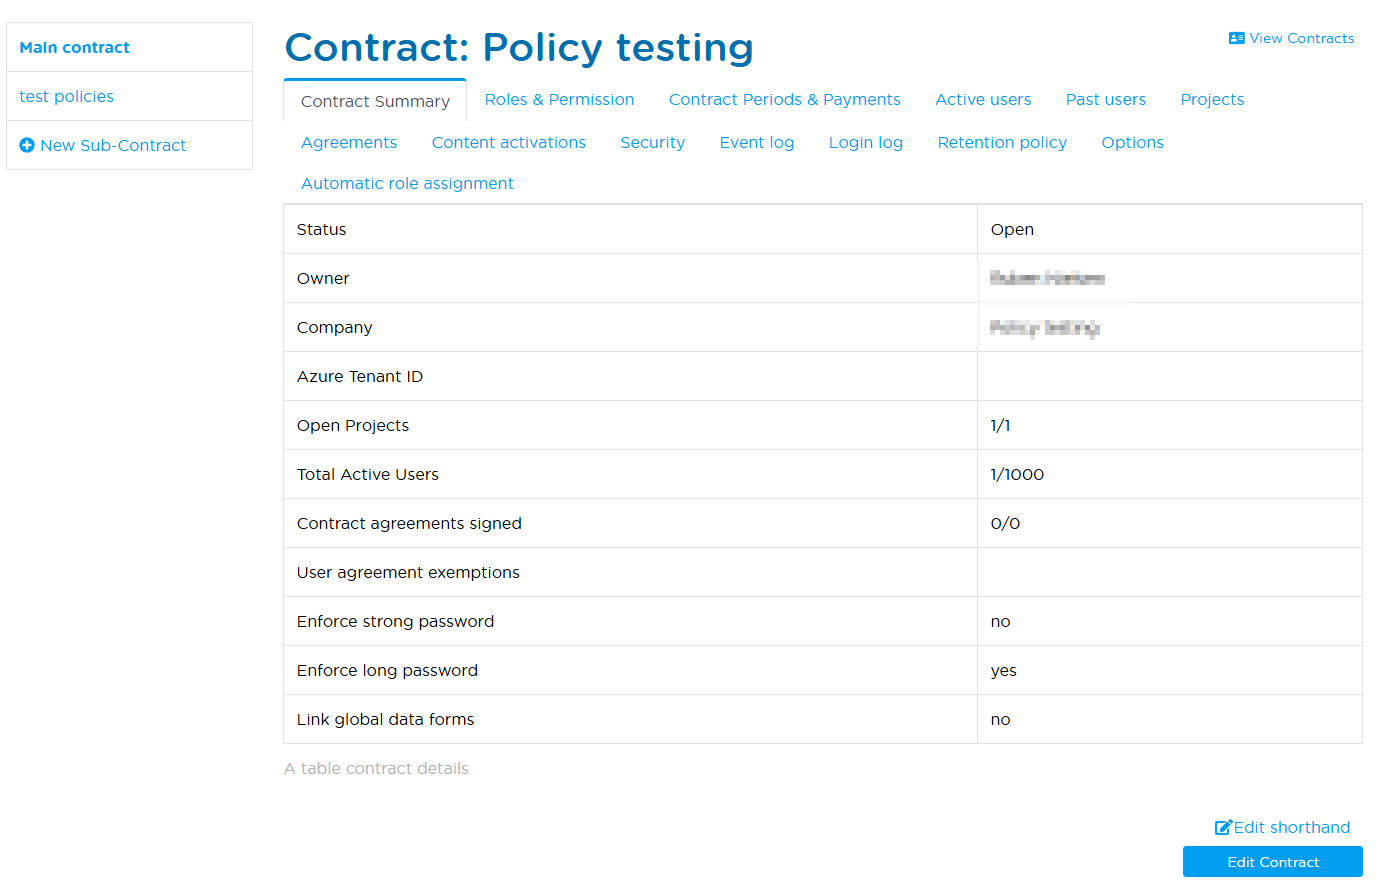
Contract summary
On the first page of the contract details is the contract summary. Basic details can be edited, but most of these settings are handled by the SafetyEngine support team. Reach out to support if you need any part of your contract expanded or modified.
The details that the contract owners can control by themselves are:
- Enforce strong password: This will require all users to have a password of minimum 14 characters including at least one uppercase letter, one lowercase letter, one number and one special character.
- Enforce long password: This will require all users to have a password of minimum 14 characters.
In addition to the basic contract details, there are a number of tabs available for the contract owner and administrators to manage the contract settings. These will all be covered in the following sections.
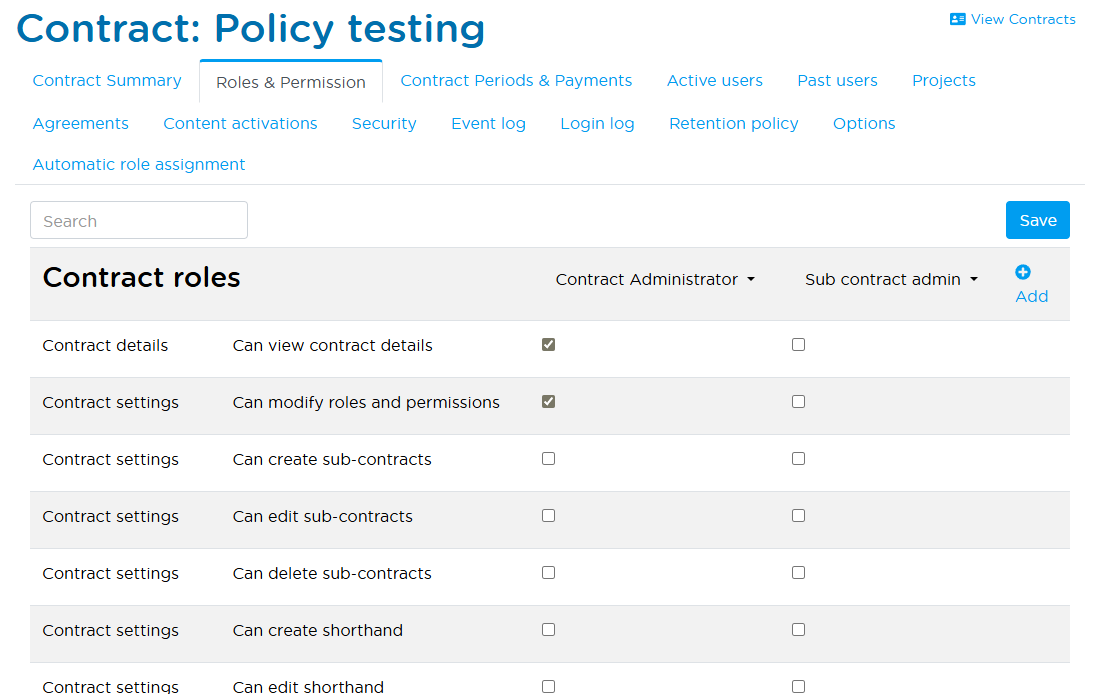
Roles & Permissions
Each newly created contract will have 3 default roles provided. For the contract level, the "Contract Administrator" role allows a user to assist the contract owner in managing most features of the contract overview. For projects, the "Project Administrator" and "User" roles are provided. These roles are described in earlier sections of this manual.
The key part is that these roles only serve as sensible defaults, but they are fully customizable by the contract owner. This means roles can have permissions assigned and revoked; be renamed and remove; and extra roles can be created as needed.
In order to provide all of this flexibility while still maintaining control of the system, there are a few overarching rules that apply to all contracts:
- The contract owner is exempt from permission checks on the contract level. This means that even if the contract owner is given a restrictive role (or none at all), they will still be able to manage the contract. This also prevents the scenario where all roles are removed or made too restrictive. In these cases, the contract owner can always log in and restore the roles to a working state.
- Superusers (the SafetyEngine support team) are exempt from permission checks on fundamental parts of the contract level in order to manage the setup and maintenance of contract meta-data. It is important to mention that this access is limited to the "Contract Summary" tab, the "Contract Periods & Payments" tab, the "Agreements" tab, and the "Content activations" tab. All the event logging, user information, and security settings are not accessible to superusers. This means that the SafetyEngine support team cannot access any user data or security settings without the contract owner's explicit permission being given in the form of a role assignment on the contract.
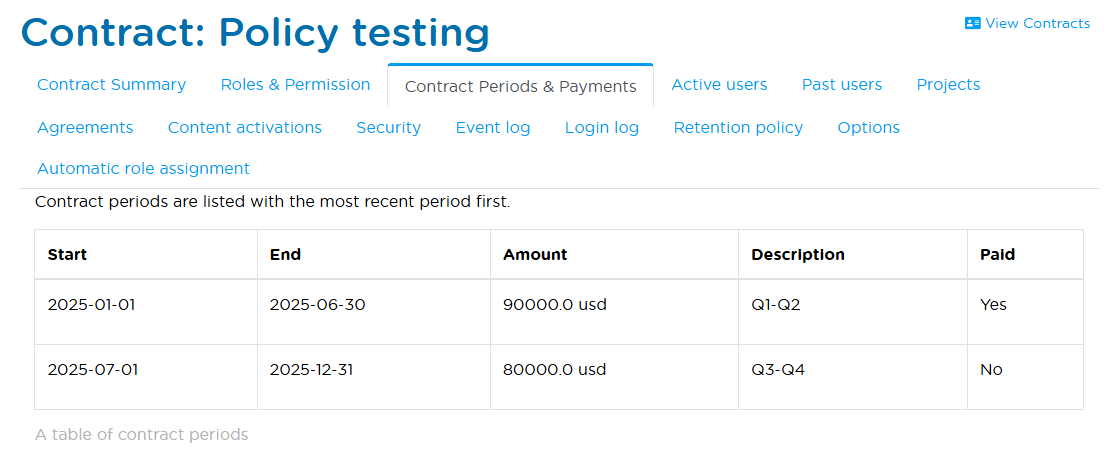
Contract Periods & Payments
This section is where the SafetyEngine support team will set up the contract periods and payment details. The contract owner can see the details of the contract periods, but cannot edit them. If you need to change the contract period or payment details, please contact the SafetyEngine support team.'
Worth mentioning is that only select contracts are set up with contract periods and payments in this way. If your contract does not have these, you will not see any information in this tab.
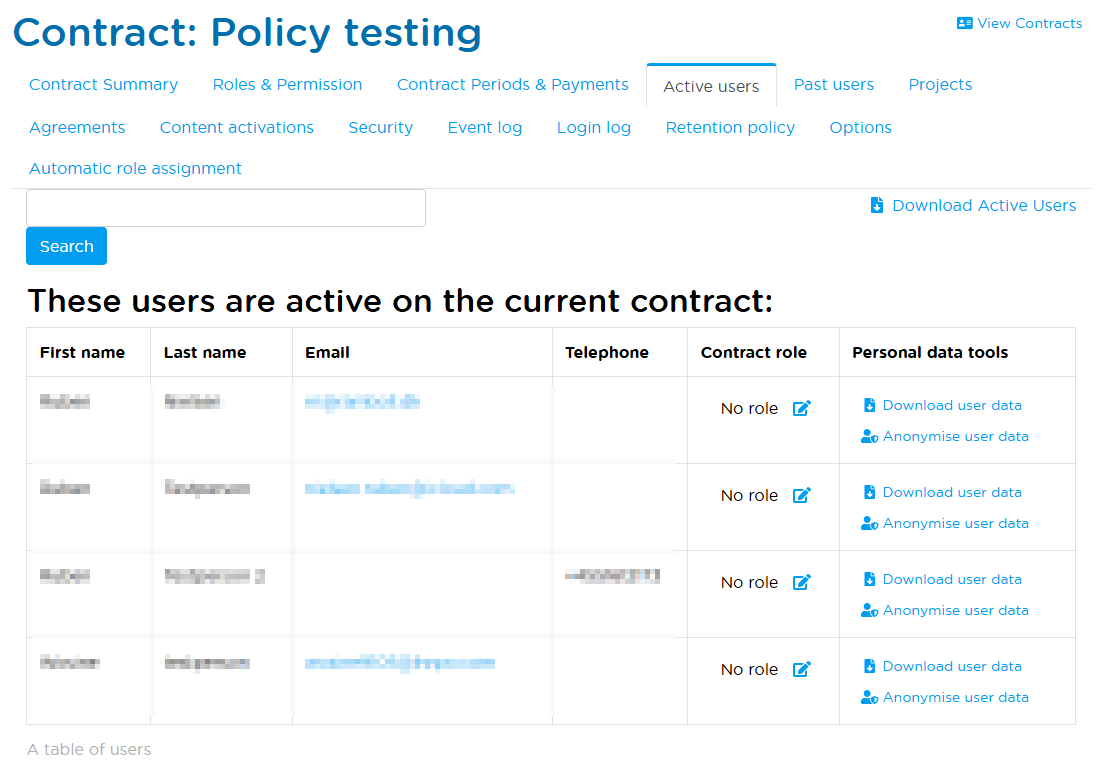
Active Users
Here you will see a list of all the users who currently have a role on any of the projects under this contract. As a contract owner, you have the ability to download the user data for any individual user, so that this can be handed over to the individual user if they request it. You also have the option to anonymise the user, which will:
- Remove the user from any project on the contract
- Anonymise any information that might identify the individual behind the user
This is also the place where you can manage the users' contract-level roles and permissions. You can change and remove their roles directly from the table.
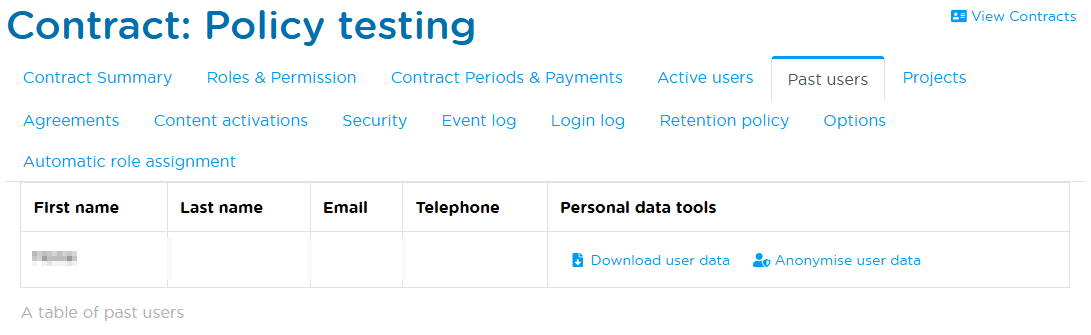
Past Users
This tab is similar to the active users tab, but it shows only users who have had a role on the contract or on any of the projects under the contract in the past. These users may be subject to deletion according to the privacy policy.
Projects
This tab shows a list of all the projects under this contract. You can see amount of users on each project, and you can quickly change the status of the project, if you need to close or re-open it.
Contract owners (and administrators, according to roles and permissions) can also join projects directly and assign a project role to themselves. This is useful if you need to manage a project directly, but you are not yet a project admin on that project.

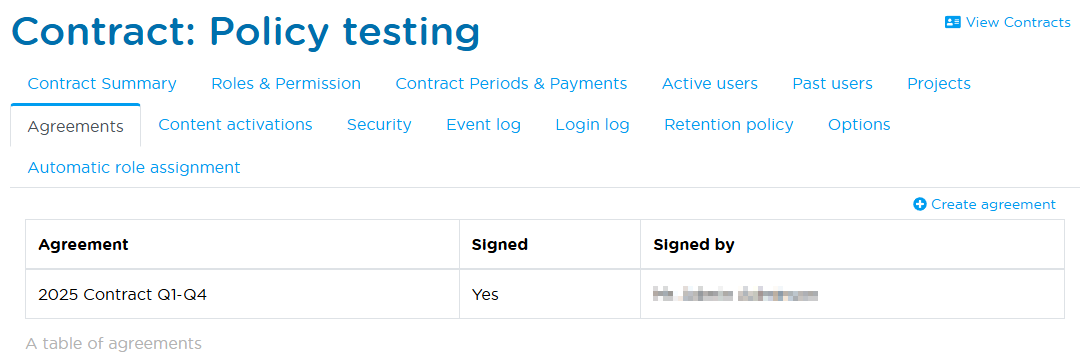
Agreements
The agreements tab will list any agreements that are attached to your contract. Not all contract owners will have agreements handled here, but if you do, this is where you can see them and sign them and keep track of the versioning of agreements that evolve over time.
Content activations
The Content activations tab is where you can manage the Security Training modules content that is available to the app users on the contract. Here you will find all the modules that have been made available to the contract, and contract owners and administrators will be able to set up restrictions to determine which projects are allowed to use which content.
Security
The security tab is where you can set up security policies that will be enforced on all projects under this contract. The settings here will be the default settings for all projects under the contract. Projects can also define their own settings, but projects will always be subject to the most restrictive rules.
There are a lot of security settings available, and they will be covered in detail below. The settings are divided into several sections, each with its own purpose.
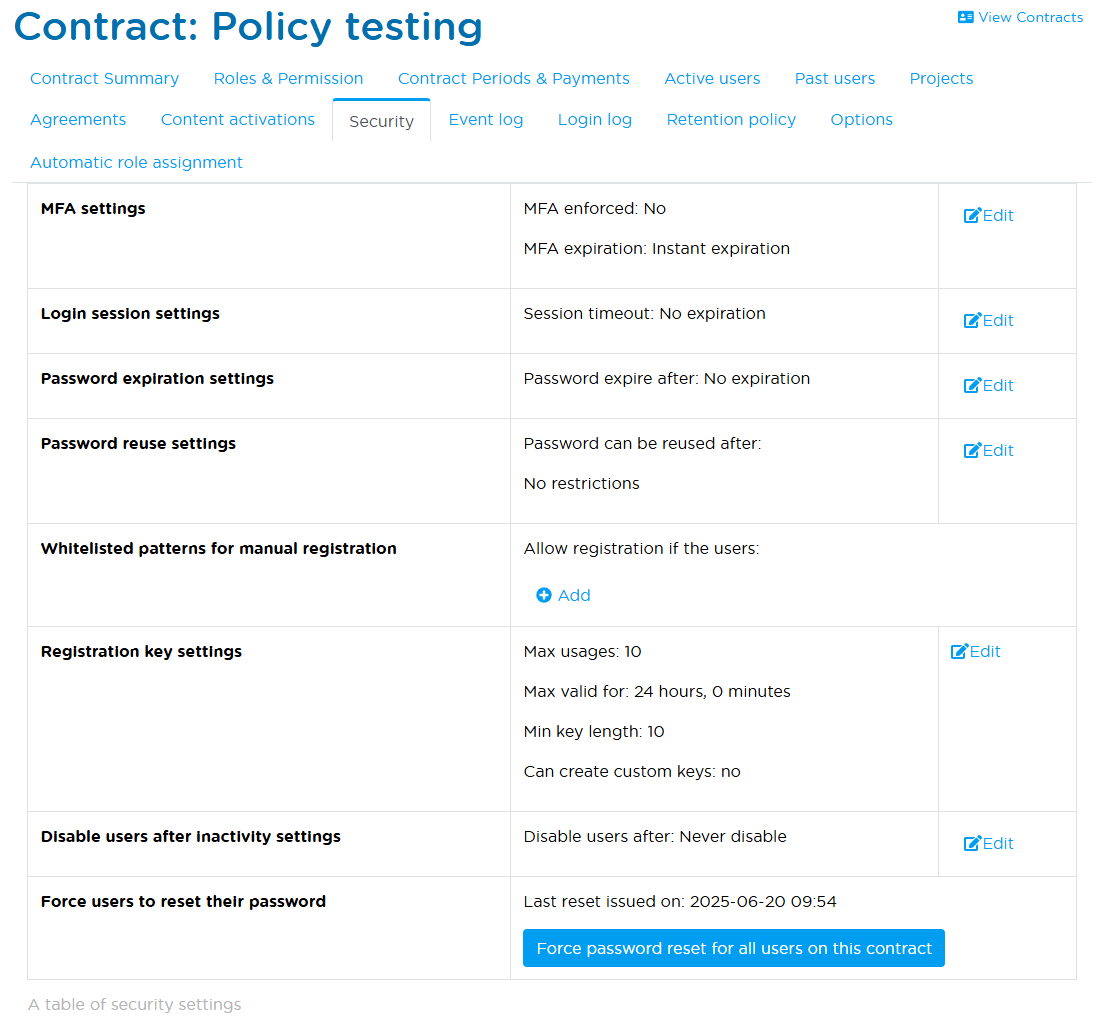
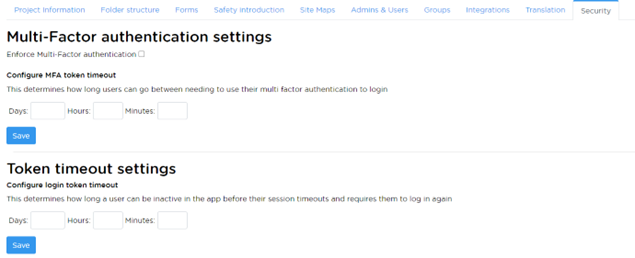
Multi-Factor Authentication (MFA) settings
MFA settings allow you to force all users in the context to have MFA enabled for logging in. You can control for how long a login can live with the timeout. If you set a timeout of 15 minutes, your users can log in with just their username and password for 15 minutes after logging in with MFA before they need to use MFA again.
Login Session Settings
Login session settings are used to control how long the user can be inactive before the user is logged out. The timeout is extended every time the user makes an interaction, so an active user will not suddenly be logged out and have to start over.
Password Expiration Settings
This section lets you define how long a local user account's password will be valid. Once a user's password is older than the defined number of days, they will be required to reset it before they can log in.
Password Re-use Settings
This section lets you define when passwords can be re-used. It lets you set a number of days, which defines the age a password must have before it can be used, e.g. set it to 60, and users cannot set a password that has been used for the past 60 days.
Additionally, it lets you set a number of passwords to remember, making it so that you cannot re-use any of the X latest password. Setting the value to 10, for instance, will make it so that you cannot set your password to any of your 10 latest passwords.
In all cases, only hashed and secured passwords are stored, and your actual password or past passwords are only known to yourself.
Whitelisted patterns
In this section, you can define patterns for whitelisting in your project. When the whitelist is empty, a user may register with any email they desire. Once you start setting up patterns for the whitelist, only email patterns that are found in your list will be allowed to register. Any email that does not match one of the patterns will be blocked from registering.

Registration key settings
In this section, you can define how long a registration key will be valid. If you set it to 30 days, any registration key that is older than 30 days will not be valid anymore. This is useful for preventing old registration keys from being used to register new users.
You can also define how many times a registration key can be used. If you set it to 1, the registration key will only be valid for one registration. If you set it to nothing, the registration key will be valid for an unlimited number of registrations.
Finally, you can control the minimum length of a registration key and whether users are allowed to control the contents of a key (in contract to only having auto-generated keys).
Disable users after period of inactivity
In this section, you will be able to define a timespan where users are allowed to be inactive. Activity is measured by users logging in and accessing a project either from the admin portal of through the mobile app.
If a user's last activity timestamp gets older than the defined number of months/days, they will be removed from the respective projects.
If the policy is set up per project; the user will be removed only from the respective projects. If the policy is set up for the contract; the user will be removed from all projects on the contract, and the user will then be listed under "Past users" on the contract page.
Force users to reset their password
In this section, you will be able to force a password reset on all users on the contract. Use this functionality only in the event of a suspected misuse, as this will inconvenience all users of the contract. Each project has a similar functionality, if you want to only force a password reset on users of a specific project.
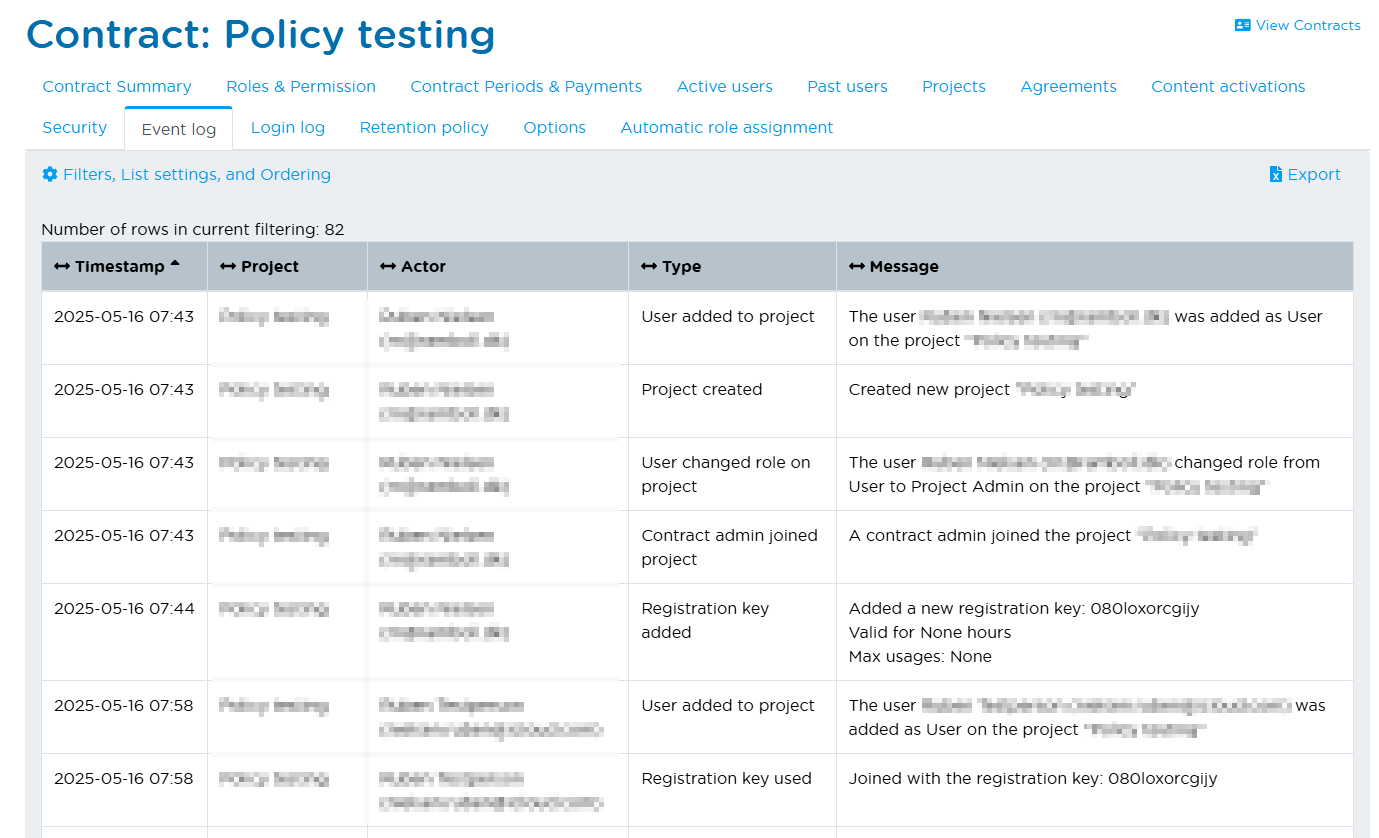
Event log
The event log captures all events that occur on the contract and any projects related to the contract. The table allows for sorting and filtering of events in order to aid in auditing any actions that have been taken on the contract or projects. The events are grouped by type, and you can filter by event type to see only the events you are interested in.
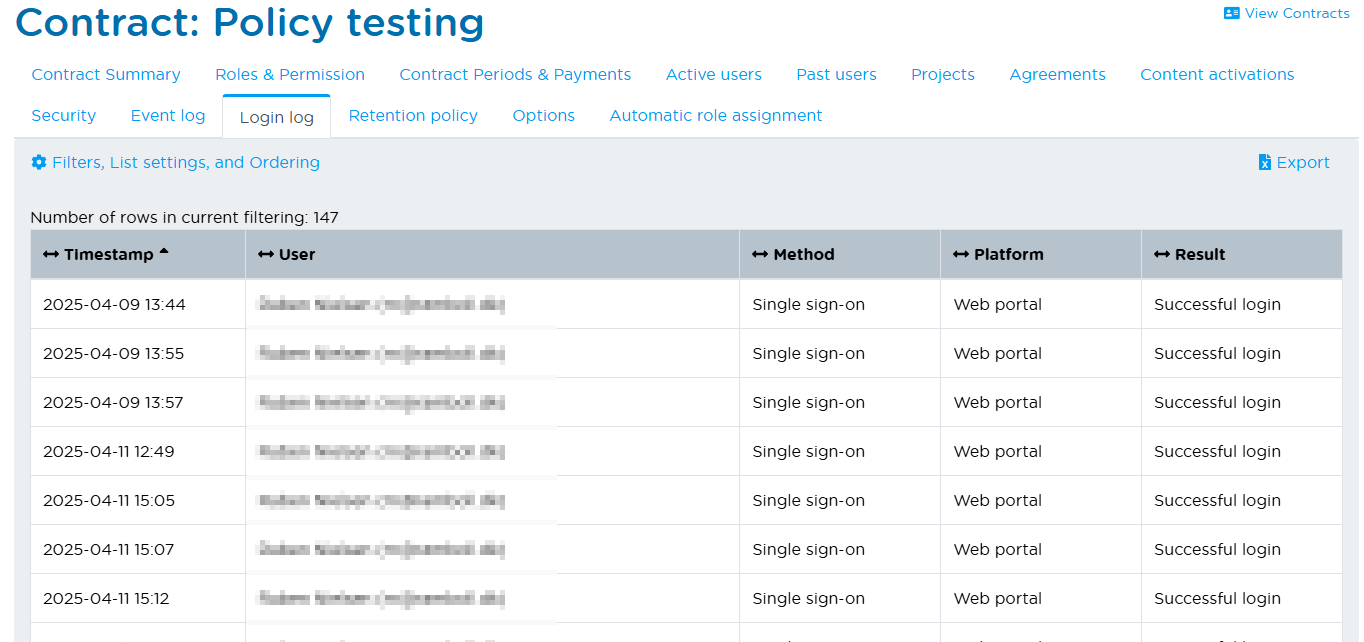
Login log
The login log is similar to the event log, but is only for login events. It shows when users have logged in, the authentication method, and whether they are signing in from the web portal or from the app. This is useful for auditing purposes and for tracking down any suspicious activity on the contract or projects.
Retention policy
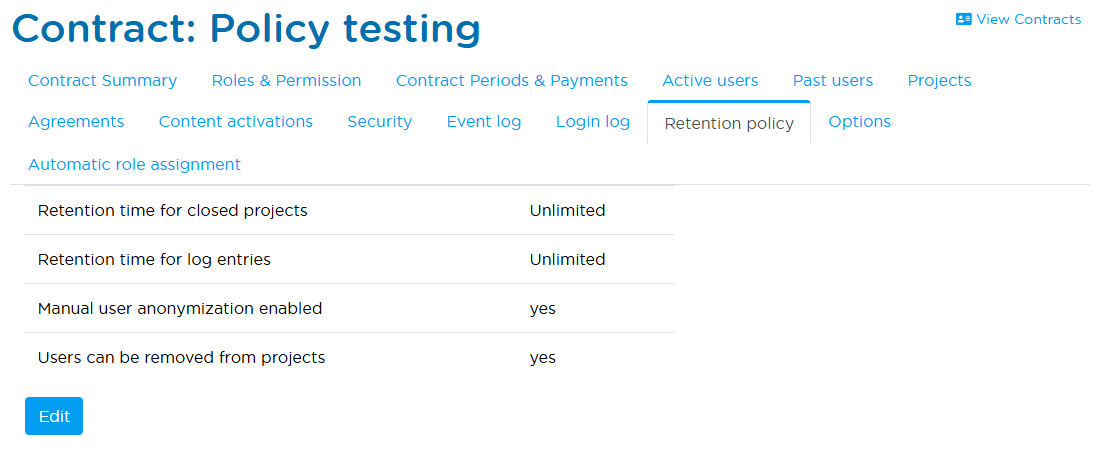
The retention policy is used to define how long data should be kept on the contract. This is useful for compliance with data protection regulations and for managing the amount of data stored on the contract.
The retention policy provides 4 options:
- Retention time for closed projects: This defines how long a project and its data will be kept after the project is closed.
- Retention time for log entries: This defines how long event log entries will be kept. This goes for contract and project level logs alike.
- Manual user anonymization enabled: This in on by default. When this is set, users with the relevant permissions can manually anonymize users. If this is turned off, the retention policy scheduler will take over. This means that if a user is not a the contract owner, doesn't have a contract level role, and doesn't have a role on a project, the user will automatically be anonymized. This check is done once a day, and the user will be anonymized if they do not have any valid role anywhere.
- Users can be removed from projects: This is on by default. When this is set, users can be removed from projects, and show up under "Past users" if they no longer have any roles. If this is turned off, users will not be able to remove users from projects. Instead, they can be disabled; which will keep them recorded as members of projects, but they will not be able to access the project any longer. This is a useful option for keeping track of users who have been removed from projects, but still need to be kept for auditing purposes. This will essentially block the automated anonymization of users, until the project is closed and deleted.
In other words; for a completely automated management of retention concerns:
- set the retention time for closed projects
- set the retention time for log entries
- Disable manual user anonymization
- Disable the option of users being removed from projects
Now project deletion and user anonymization will be handled automatically by the system.
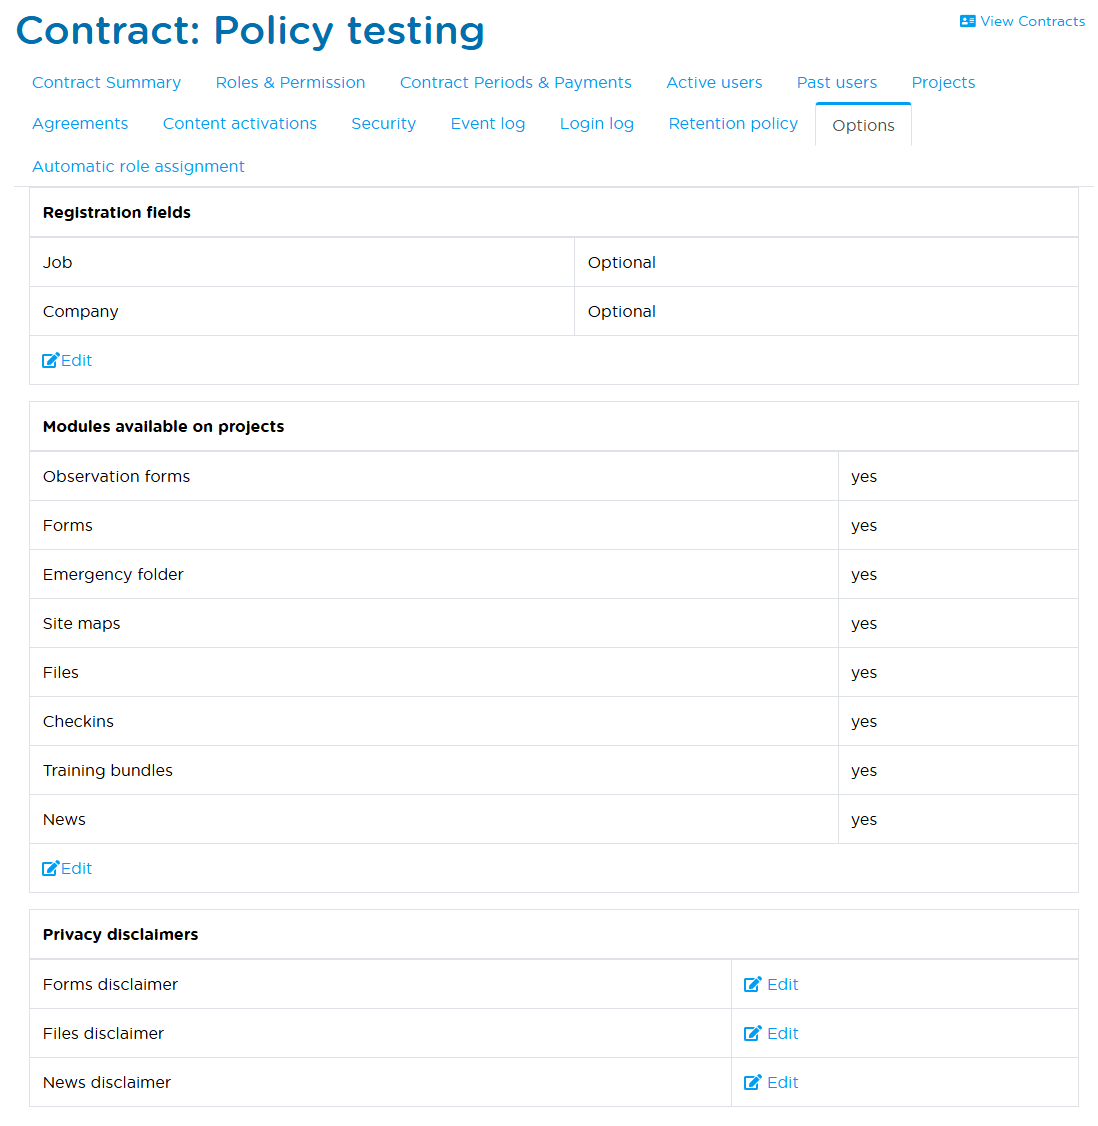
Options
The options tab is where you can enable, disable, and configure various options for the contract. This includes enabling or disabling features like the Safety Introduction, check-ins, and form responses.
There are three sections in the options tab:
- Registration fields: This allows you to make various user profile fields mandatory, optional, or disabled during registration. This is useful for ensuring that users provide only the necessary information during registration.
- Modules: Disable functionality that is not needed for your project. This is useful for simplifying the user experience and removing unnecessary features.
- Privacy disclaimers: Define default privacy disclaimers that will be shown to users when they upload files or submit forms. This is useful for ensuring that users are aware of the privacy policies and how their data will be used. Projects can set these fields individually, but if they are not set, the contract level defaults will be used.
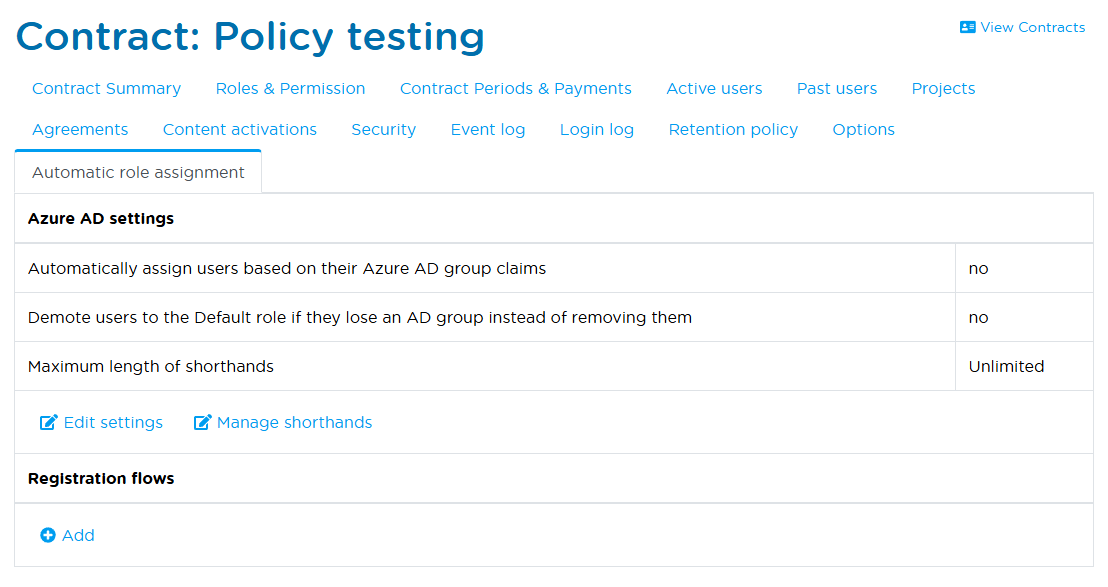
Automatic role assignment
In the automatic role assignment tab, you can set up rules that will automatically assign roles to users based on their registration information. This is useful for ensuring that users are assigned the correct roles without having to manually assign them.
There are two ways to set up automation:
- Azure AD settings: This allows you to enable fully automated role assignment base on Azure AD group claims. Each group claim received during SSO login will be matched against shorthands that contract administrators can set on contracts, sub-contract, projects, and roles. If a user's claim includes both a target and role shorthand, the user will be assigned the role specified in the rule. If a user has multiple claims that match different rules, each rule that matches will be applied. If there is a conflict, where the claims specify conflicting roles for the same target (e.g. "user on project A" and "admin of project A"), those claims will be ignored, and the user will not be assigned any role for that target. This is useful for organizations that use Azure AD for user management and want to automate role assignment based on Azure AD group membership.
- Registration flows: Here you can setup rules to match against users emails or Azure AD claims. If a user matches the rule, they will be assigned the role specified in the rule.
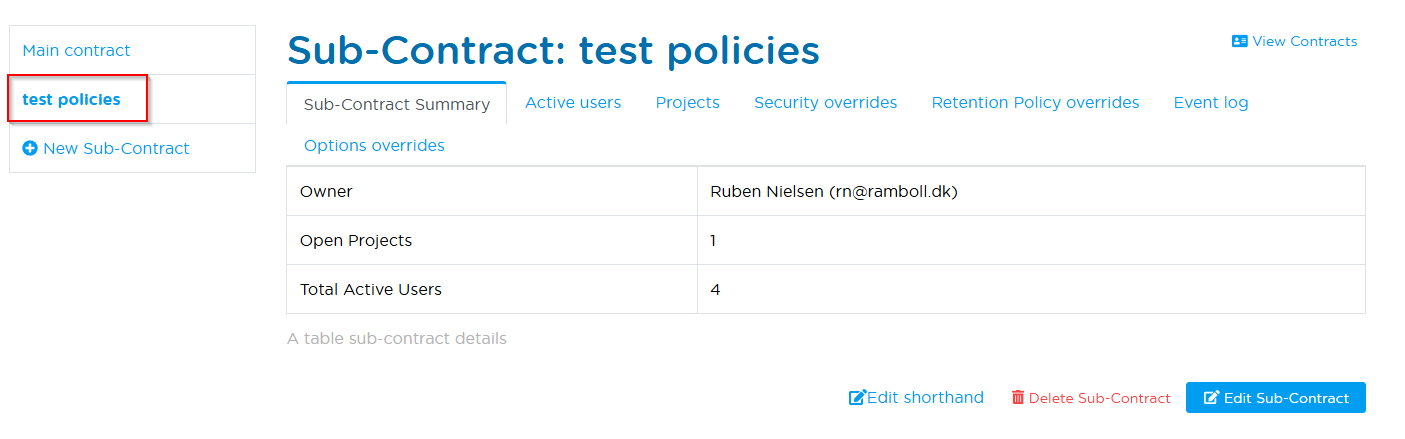
Subcontract Administration
Subcontracts are a way to manage the grouping of projects, teams and responsibilities within a contract. They allow for more granular control over projects and users, and can be used to manage different teams or departments within a contract.
The subcontract page is similar to the contract page and defines many of the same tabs, but is scoped to the subcontract level. Generally, aside from being the place where projects are created and managed, the subcontract page is where you can manage subcontract level overrides to contract-level rules. This means that any subcontract can define overrides to the settings defined on the contract level regarding:
- Security
- Retention Policy
- Options
This means that a subcontract can for instance:
- Enable the "forms" module, even it was disabled on the main contract.
- Have shorter registration keys.
- Have longer login session timeouts.
- Keep closed projects for longer than the contract level retention policy.
- Choose to manually anonymize users, even if the contract level policy is to automatically anonymize users.
This gives the contract administrators the flexibility to manage their subcontracts in a way that suits their needs, while still adhering to the overall contract policies.
Create project
The "Create project" tab is where you get to create projects for the subcontract. The information needed to create a contract currently entails only:
- The project name
- An optional description of the project
- A project status, defaulting to "Open"
Users' activity list
This page is for getting an overview of the app users on your project and their progress in the safety introduction. You can see when they joined the project, when they started their training, how far they have gotten, when they completed the training as well as their score. If your project has several safety introductions, you can see which they have completed.
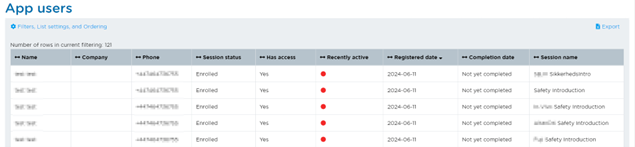
Export to Excel
On the Users’ activity page there is an option to export all of the table contents to excel. It will take the current filtering, enabled columns and ordering into account when populating the excel sheet, so it will look just like it does in the table on SafetyEngine.
Files list
The files list is used to get an overview of the files available to the app users on your project. Files are split into folders that act as folders in the app. At the top each folder gets a tab for easy overview. The files can be hidden with the “status” attribute. Files without a folder will also not be visible in the app.
folders can be limited to groups, which will limit the access to the files with those folders to certain groups.

Adding files is done with button in the top right of the table. You can add multiple files at once too, just be aware that files uploaded together will get the same folder.
News list
The news list is used to manage the news items available to your app users. News can be limited with groups, and they can be hidden when they are no longer relevant. News has a prominent position in the app and is the main way for admins to communicate with the users in the app.
When creating news, you can choose to send a push notification to all users that can see the news item, making it an even more powerful tool for communication to all your users.
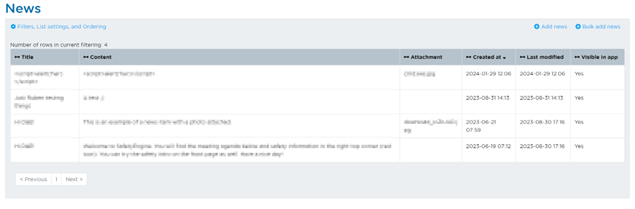
News items can have a picture or video attached to them too.
Check-ins list
The check-ins list gives an overview of the check-ins and check-outs from your site. They tell you who has come and gone during the day and when they did. If you need to control access and monitor access this is the place.
A check-in is registered when a user scans the configured QR code with the app and check-out happens when they scan it again.
Form responses list
This is where you see all the responses your users have made to forms. Each form has a tab for easy overview. Each response gets a row. To see the specific values entered for each field click the “view content” option for that form response. Form responses can be assigned to a user in case it requires attention or fixing, and every response has a status to control whether the designated action is being carried out or is already handled.
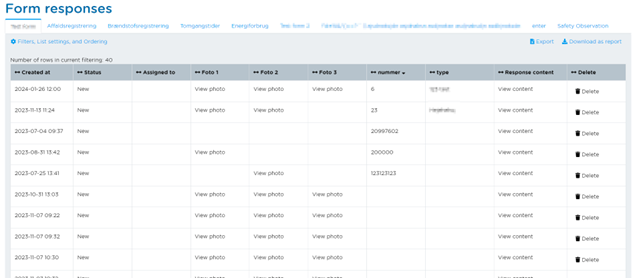
The fields of the form get their own column.
The “view content” dialog gives the option to download the data in the form response as JSON for a raw data format, or as a PDF or docx file if the form has a template specified.
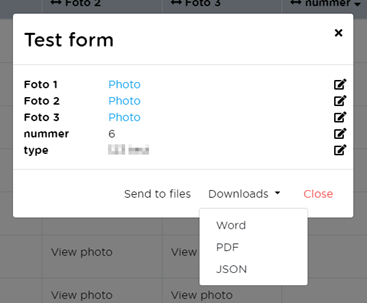
The inputs can be edited from either the “view content” dialog, or in the cells in the table. Editing a form response will send a notification to the author of the form response, letting them know that their response is being handled.
Form responses can be sent to files. This will open a new dialog where you choose the folder the file should be put under. Then, the form response is rendered to pdf format and sent to files under the chosen folder. This requires the form to have a template to be able to generate the pdf file.
Single Sign-On (SSO)
This section explains how SafetyEngine provides Single Sign-On (SSO) through Azure Entra ID.
Overview
SafetyEngine supports Single Sign-On (SSO) through Azure Entra ID. This means that if the user's organization uses Entra ID for authentication, the user can use the same credentials to log in to SafetyEngine. Before the user can use SSO, the user's organization must have set up Entra ID and SafetyEngine must be configured to use it. There are a few steps that need to be taken to get set up:
- The user's organization must have set up Entra ID.
- SafetyEngine must be informed of the user's organization's Azure Tenant ID.
- SafetyEngine must be informed of the domain names and email patterns that your tenant administers, so they can be configured for signing in through SSO.
- The user's organization's Azure administrators must approve SafetyEngine for signing in using the user's credentials. For details, please contact SafetyEngine support.
Once these steps are completed, the user can log in to SafetyEngine using the user's Entra ID credentials:
- If the user is visiting SafetyEngine for the first time, a new user profile will be created for the user when they log in.
- If they already have a SafetyEngine account using the same email as their Entra ID account, the two accounts will be merged, and they will only be able to sign in with their Entra ID credentials going forward.
Entra ID integration
SafetyEngine is configured as a multi-tenant enterprise application on Azure, which means that it can be used by multiple organizations. When the user logs in to SafetyEngine using Entra ID, Azure will send a token to SafetyEngine with basic information about them and their organization. SafetyEngine will use this information to create their account. The information that SafetyEngine receives from Azure is:
- E-mail address
- Name
- Unique object ID in Azure
- Any claims that the organization has set up to be sent to SafetyEngine
Permission level
Entra ID also provides the Microsoft Graph API, but SafetyEngine does not make use of this API and will request no Graph API permissions.
SafetyEngine uses, therefore, only the lowest level of permissions available for an enterprise application on Azure, ".default", which only allows for "Sign in and read claims".
Sign-in flow
The full flow of the sign-in process is explained in the following flow chart
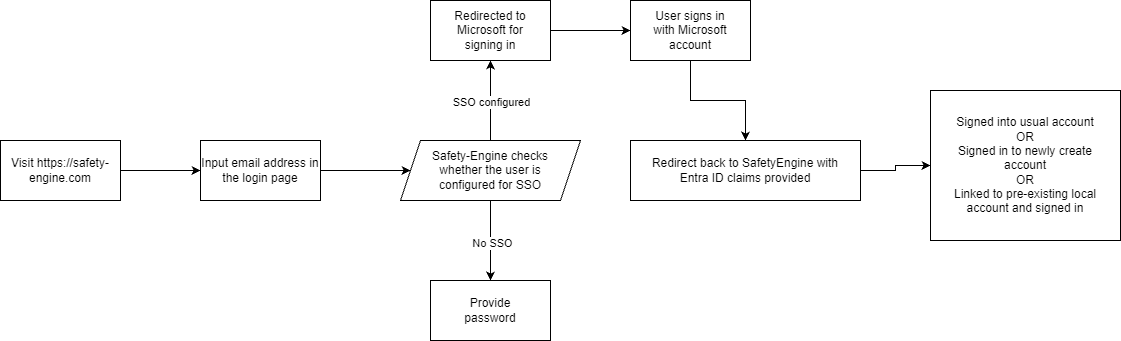
The chart above accurately describes the process of signing in with SSO from the browser (the admin portal). The app follows the same process, except when the app needs to redirect to Microsoft, it opens an in-app browser session to carry out the sign-in process. Once the sign-in is complete, the in-app browser closes, and the app continues as if the user had signed in with a username and password.
FAQ
Must I use my own device for the app?
To complete the game and use the app all you need is an account, that can be created and used on any device.
If the site you are on requires MFA then you will have to bring your own device to receive an SMS or access your authenticator app to log in.
Who can see my training results?
Project admins can access the SafetyEngine web portal and see the training results for all users on the project.